Website powered by

FMP Blog 21 - Unreal stuff

Work In Progress / 17 April 2021

This is just a quick blog for some Unreal presentation work I did over easter. At this point in the FMP I was starting to burn out a bit. With the advice form my mentor I decided to work on something different, which was the presentation aspect of my work in realtime. One of the requirements for my handin is to present my character models in Unreal Engine with idle animation and lighting, as well as to take the opportunity to show off any particle systems, UIs and sound effects. I actually had a lot of fun doing this and it was a break that I needed for sure. 

I made a blueprint actor and added the skeletal meshes of my characters. I then added a spring arm and altered the camera blueprint to achieve a slightly shaky cam effect. I played around a lot with the settings and camera position until I got the effect I wanted.

I also added aspects like subs surface scattering to my character's skin and hair, and set up a series of props and particle systems, including my flame particle system I made a while back. 

The props that I made for the background were a stage truss asset and the stage itself. This gave the characters more context and made the scene a lot more interesting.  

I also added my own logo to give the characters a brand, for the fighting game idea that I had. I set up a UI widget to place the logo on screen, and added some royalty free music to set a mood.  

The presentation is still a work in progress but it was a nice change from the sculpting process and allowed me to experiment with new techniques for presenting in real-time.


Captain Project Blog 10 - Unwrapping and Bake Testing

Work In Progress / 25 October 2020

After a lot of tweaking my retop to make it as efficient and presentable as possible, it was time to unwrap and prepare it for baking in Substance Painter. I unwrapped the objects that would be symmetrical first, like the eyeballs and the rankings on the collar. Once I did this I copied the object over using the symmetry modifier, which resulted in a copied UV also. This will help me save space on my unwrap sheet and time spent texturing.


The teeth are very small and mostly concealed by the lips, so the retop didn't need to be high res at all really.


This simple shape was perfect for what I needed.


When organising my UV sheets, I sorted the objects into similar colours. E.g. the hair, skin, gloves and belt would all be shades of brown. I did the same for the clothes and metalwork. I only needed two UV sheets as there was plenty of space for me to place all of the UV islands, including the props.

Here are a few examples of the methods I used to unwrap different objects. Conical objects were always the easiest to unwrap and relax.


The face unwrapped well using the peel modifier, but the mouth verts needed to be adjusted as they were overlapping.


  The chain pieces were all copied so that they used the same UVs, which saved me a lot of space in my unwrap sheet.


Here is the packing for my two sheets. I tried to pack as closely and efficicently as possible.


Finally after unwrapping I prepared my model to be baked in substance painter by assigning material IDs, then exporting the high and low poly versions seperately.


This is when I started to make a lot of dumb mistakes, which resulted in loads of trial and error. My model had some baking errors, and adjusting the settings like antialiasing and resolution didn't help. I read a few forums online and some advice threads for bake workflow, and decided that the problem must be within the mesh itself.


Weird normal errors


  The chains had nothing to bake onto because I forgot to include them into the high poly model.


  This belt loop had the AO from the chains imprinted as the UVs were overlapping.


  I went and fixed most of these problems in the UV modifier in 3Ds Max, starting with the belt loop. I moved the single loop that didn't have a chain attached off of the other belt loop UVs. This fixed the AO baking issue in Substance.


  I also realised that some of my verts were slightly overlapping in the UV for the shirt panel and the bottom corners of the shirt. This fixed the normals error.


I fixed all of the errors regarding normals and AO, but in order to get an even cleaner bake and avoid items baking onto other nearby objects, I decided to split my model into parts. The cages for each object will work a lot better like this. I found an example in a tutorial video, which I screenshotted below.


  The moral of this blog post is - Don't waste your time making dumb mistakes like me and check your work properly before exporting it.

Captain Project Blog 9 - Retopping Continued

Work In Progress / 25 October 2020

Like I mentioned in my previous posts, I went back to edit the topology of the shirt and trousers, mainly making it more efficient by collapsing unneeded edges.


I created a crocodile mouth at the back of the knee so that it would collapse better after rigging.


I also improved the efficiency of smaller objects like the belt loops, belt end and buckle.


  The hand was really tough and I had to rework it a lot. I tried detaching the fingers and match up the loops, then welding them back, but it made a messy ugly mesh that was not going to be topologically correct.


 So I started the hand retop from scratch, this time using a strong reference for the front and back. This went a lot smoother and the topology was a lot better.


I used the relax and drag tool to neaten the mesh, particularly where the verts curve around the fingers.


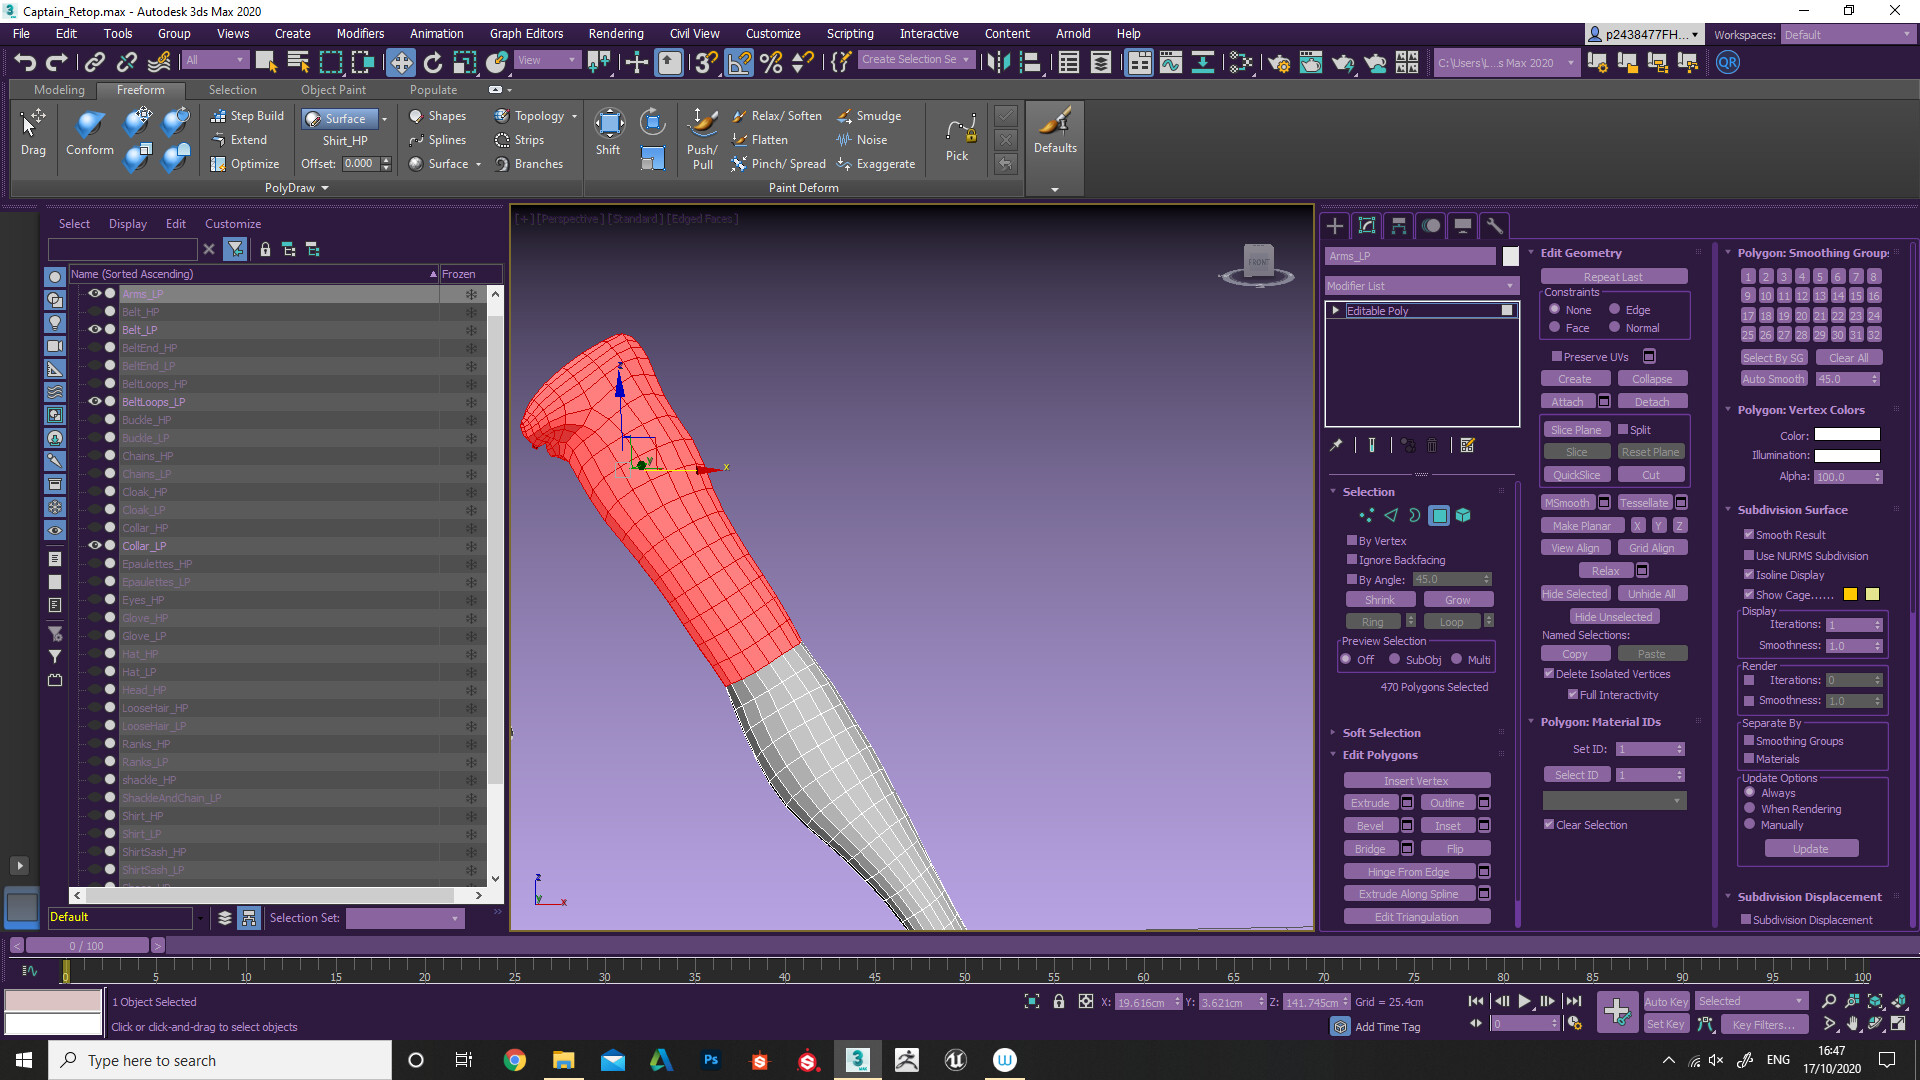
For the bare hand, I took the glove mesh and copied it over. It would work just as well as both use the same topology. I shrank it and welded it to the arm, and then used conform to fix any sticking out faces.


This is the final result of the hand.


I did some final fixes on the shirt panel to optimise the efficiency.


I also did some final neatening for other small details like the epaulettes. I used the Ngon selection tool to make sure that I didn't miss any Ngons.


  I realised that I had forgotten to model an earring which is seen in the concept. Therefore I made a simple hoop earring in 3Ds Max. It will not need to be baked as it is such a small and simple detail.


  This is the earring with the rest of the head.


Now for the face retop. This was a challenge, but once again I was excited to test out new methods to improve my workflow and efficiency. I attempted the quad remesher just to see how well it could do and to see if I could work from there. To spoil it, it was awful. The loops went around the back of the head and made some funky goggles when I deleted them. If anything it made me laugh.


So I tried out a different method. Not the classic, using step build, but a tutorial by SpeedChar on Youtube. It involved using Zbrush remesher and the ZRemesher guides brush. 

The guides brush is really cool as it makes simple loops in your ZRemesh with only a few strokes to guide the direction. I used it around the mouth, eyes, around the nose and jowls, chin and ears.


I ended up with a really great topology, and I only needed to tweak the resolution in ZRemesher a bit and then bring it into max. This method saved me a lot of time. In hindsight I could have maybe used it on the hands too.


This is the remesh in Max. I still needed to tweak the density of the loops around areas like the eyes, nostrils and mouth.


I collpased the loops in the eye sockets for maximum efficiency.


This is the final face topology. The hair laying on the head will be baked on.


Captain Project Blog 8 - Decimating and Retopping

Work In Progress / 25 October 2020

I returned to the next phase of my project - the retopping stage. I used decimation master in Zbrush to redice the tri count drastically but to maintain a high level of detail before going into 3Ds Max. In Max, I decided to experiment with different methods to test which ones were more efficient for me. I began by importing my sculpt using GoZ and then shrinking it to the average height of a woman.


I tested out a free quad remesher by Exoside, which I could use as a base and then edit for objects like props or items of clothing. I could then edit the loop placement and tri count afterwards.


 The first attempt on the trousers wasn't too great as the loops were spiralled and asymmetrical. The count was also way too high. I changed the settings so that symmetry would be applied to the objects being remeshed, applied Adaptive quad count and lowered the target quad count. 


Before editing settings


After editing settings. The result is much cleaner and will animate correctly around the hips.

To get rid of the inside faces, I deleted loops at the openings of the trousers and deleted the suspended element.

I repeated the process on the shirt, but I decided to check it with my tutor in class the next day. I will describe my improvement process for the shirt in the next blog.

The main areas to improve are the density of quads under the armpit, and around the elbows and hips.


To delete the interior faces I repeated the same process as the trousers.

This is how the shirt and trousers look so far.


I moved on to the smaller accessories, like the panel sticking out of the shirt.

At first it was much too dense for what the object is, and so I deleted faces in the areas where it would be concealed.

I also pulled the edges in to make sure that they clip into the torso.

The belt and epaulettes were very simple to retop, I deleted the interiors for these too.

I really like how the silhouette of the  epaulettes looks.


For these objects I will delete one before unwrapping, unwrap and then use symmetry so that the UVs are the same and can be stacked to save space.


I revisited the collar ranks multiple times so that I could get the shape as close as possible to the sculpt, and evened out the distances between the edges.


I dragged in the outer edges and reduced the density of tris.


I then used the relax conform tool in  the freeform toolbar to neaten the quads. The final result was a much neater mesh.


The hand was the most challenging part so far. I have retopped hands before but I struggled to get the correct density and to choose which sort of topology detailing I should use. I needed something that would be able to rig well, particularly the finger joints. However for now, I am using a basic quad remesh for the glove and I will revisit the hand topology soon.


I did work on the inside, capping it towards the wrist. I also reduced the density of verts.


For the shoes, I experimented with quad remesher on each individual subtool but I knew I would need to retop the entire shoe for the most efficient mesh. I used a combination of step build and extend to retop the shoe, making sure I took into account any light changes in silhouette.


I also noticed that one of the laces had flipped normals and so I fixed this very quickly with the normals modifier, and checked 'flip'.


I started retopping the end part of the shoe and worked along it. I made sure I got the shape of the toe correct as it is a very clean distinct shape.


For the heel I extruded the edges inwards then used extend and conform.


I continued the topology from the heel, using the relax tool afterwards to straigthen out the loops.


I then whacked on a symmetry modifier to create the second shoe and see how they looked together. I will delete this before unwrapping and unwrap one shoe only so that the UVs are duplicated once I copy the shoe.


For the hat I used the same techniques as the other smaller accessories on my model.


I struggled with the patch as the conform tool inverted the movement of the verts. It turned out that using the conform drag tool worked a lot better, and then I could conform using the regular tool just fine.


I deleted the arm part that I didn't need as it would be underneath the sleeve. This will improve the efficiency of the model as less tris will be wasted here.


I used quad remesher for the belt buckle and the end of the belt. I did reduce the number of loops afterwards, which can be seen in my later screenshots.


I wanted to ensure that the cape was not too low poly as I wanted to apply some sort of cloth physics later on, and I also needed it to retain its shape, especially in the jagged areas. So I revisited it and tried to improve the distribution of loops.


I adjusted the angle of the sword handle as I was not too happy with it. I made the curve smoother for the high and low poly versions using Soft Selection.


I did a remesh of the chains. I decided to use the lower poly version without baking them as they looked good once smoothed.


For the shackle I got rid of some of the loops rather than use the quad remesher as it messed up towards the curved area.


This is what it looked like if I brought the poly count too low. I needed to retain the curve at the end.


I remeshed the loose pieces of hair individually. I considered using alphas or retopping it in a conical shape but I decided that it would look better individually, and if I experiment with different tri counts it can be efficient.


This is far too low so I increased it again to get to a mid point.


This is a bit too high but it was easy to fix by deleting some loops then using the relax tool to unify them.


Captain Project Blog 7 - Creating the Mouth

Work In Progress / 18 October 2020

I made the teeth next using references of existing teeth made in zbrush. They will be surrounded by a mouth box placed in 3Ds max.

I started by creating a basic gum shape. I accidentally made it a bit more square, but I corrected this later in the process.


I then created indents for the teeth, starting with the top row.


To create the teath I masked off the indent and extracted it, and used the move tool to shape it. I used the view of the teeth form below to see how the base of the tooth is shaped, as it widens out at the bottom and is thinner and flatter towards the top.


I paid a lot of attention to types of teeth, like the four front incisors, and the canines on the side. Then there were four molars placed on either side.


I separated the teeth into polygroups to make them easier to adjust.


Then to get the shape of the gums I used clay build up and the smooth tools, as well as dam standard to get a more raised edge around the tooth.


To create the bottom row, I duplicated the top row and adjusted the sizes and positions of the teeth to anatomical correctness. 


I found that the bottom row of teeth were generally smaller and slanted inwards more.

Also in most of my reference images I found that the upper row of teeth overhung a tiny bit.


There is also generally a gap between the top and bottom molars on the sides.


 I then used transparency to correctly place the teeth in the mouth. I ensured I used her skull shape as a reference for the position of the teeth.
  

After placing the teeth, I realised I needed to work more on the shape of the mouth to match the concept even closer.


 To work on the mouth separately without affecting the rest of the face, I used mask by polygroup.


I needed to drag in the planes of the lips towards the inside of the mouth more so that it would look more seamless during retopping, and so that her lips were correctly placed around the teeth.


At first it resembled a botched lip filler, but after more work I think that I successfuly got rid of this effect.


I smoothed out the lips more and reattached them to the rest of the face. I checked that the side profile was looking ok and made sure that the area of skin around her mouth also looked fine.


The corners of the mouth now look more natural and there is enough space coming from the lips towards the inside of the mouth.


Here is the final detailed sculpt in Zbrush!


  The next stage will be retopping.


Captain Project Blog 6 - Continuing with details in Zbrush and Using a Tutorial to Create Locs

Work In Progress / 18 October 2020

Welcome back to my project. In this post I will continue to describe my sculpting process in Zbrush, mainly focusing on smaller details.

I revisited the fingers and built nails using a mask, then thinly extracting the subtool, and a combination of the move tool, smoothing brush and inflate to get the organic gentle arched shape of the nail.


The cloak was something I hadn't really refined much, mainly because I am going to use rigging and cloth physics with it and also because the surface is going to be covered with cloth alphas. I decided to revsit it and make the shape appear more organic and uneven, to mimic a piece of cut animal hide.


This next part is the main event of this blog post - making the hair for my character. I used a free guide on making afro-caribbean locs in Zbrush, made by Pablander. The guide takes you through the process of making sculpted locs, and then later adding fibermesh. I will not be adding fibermesh as this does not fit the art style I am going for, but the first half of the guide was extremely useful in creating the sculpted portion of the locs instead.

I started by adding smaller strands rooted in the hair cap. I used the picker tool to snap the start of the tube to the cap and then I could easily position the hair without it coming loose. To make them appear natural I wound strands around eachother.


I also made sure I included smaller strands in the ponytails.


The next part of the guide says that I could use polygroups and set brush masking to 100 by polygroups, so that the brush only affects the first poly group it touches. This allowed me to move each individual strand of hair with the move tool to create a wavy and uneven shape of each loc.

This is the result from using the move tool on all the polygroups.

I made sure I did the hairline too.

I checked how it looked with the hat on, and made sure that there were no pieces of hair clipping through. I also adjusted the hairline, pulling it forwards as it was too far back perviously.


I then used the pinch tool with the spray dots which would stagger the thickness at random along the locs. I combined this with the inflate tool in other areas to create a natural shape for each individual loc.

I also adjusted the positions of the locs as I went, incase there were large gaps that exposed a lot of the scalp. It doesn't matter so much as she is wearing a hat, but I still wanted it to look good even without the hat.  

The next part of the guide tells me about how I can implement noise. I didn't want the noise to be too fine as it would create too realistic of a texture, and this would defy my style guide. I used the surface tab to do this.  


Close-up of the locs. I wanted to dress the edges of the ponytails, using hair bands. Here you can see the difference between the hair with and without the edge dressing.


  I put one band around each pony tail. I am very pleased with the final outcome of the hair! This is an excellent guide and I fully recommend checking out Pablander's work and guides.

I refined the brows using fine brushes to sculpt hairs in different directions.


 The hat still needed a lot of attention. I started by adding seams around the base, on the front and back of the hat and around the top of the hat.


I used the inflate tool and the trim dynamic brush to flesh out the hat top, and smoothed it out well so that it didn't look bumpy afterwards. 


With the top smoothed, I moved on to the creases around the hat in areas where the kepi hat slouches slightly and where the fabric patch is pinned on.


I then increased the poly count of the patch using zremesher so that I could make the shape more accurate.

This is the final hat.


The shoes are next! I used the Micheal Pavlovich boot tutorial that I mentioned in a previous blog post to help me sculpt the boots in more detail. I started by extracting the different components of the boot. These can be seen at the front of the boot and at the heel.


I then created the soles using a similar method, keeping the poly cont low as to get a neater shape, before refining it.

The boots so far.

I created a seam in the middle where the sides of the boots would be pulled tightly together with laces.

  
To create the laces, I used the same method as the hair, using curved tubes and the snap tool.

I then blended the heel of the boot with the sole to match my reference, and smoothed it out.


Finally, I used mirror to create the second boot which was exactly the same now as the first.


Captain Project Blog 4 - Blocking out the props

Work In Progress / 18 October 2020

Props time! Let's start by explaining how I made a simple sword block out, using 3Ds Max.

I began with a simple rectangle that I modified using soft selection and the FFD 4x4x4 modifier to creater a tapered end. 

I extruded the edges of the end of the blade to make the slot shape for where the blade would flatten out, before being attached to the hilt of the sword.

I then extruded it outwards to make the flattened piece of rectangular metal, as I saw in my reference images and the concept. I also slapped on a turbosmooth using smoothing groups to maintain the correct shape, and then I used the spline tool in compound shapes to create the curved sword hilt and hand guard, typical of civil war union cavalry swords of the 19th century.

Again I used soft selection combined with the FFD modifier to edit the width of the guard. I found that it was more tapered along the hilt and widened near the hand, as to protect it in battle.

I then created a simple cylindrical handle which I bent to the correct shape. This is a rough handle shape as I intended to go into Zbrush and edit it and decorate it with the leather banding.

This is the sword blockout in 3Ds Max.


I then brought it into Zbrush and tried to create a leather handle strap, however, I was not satisfied with this initial outcome as I couldn't reach the level of accuracy that matched the reference.


I tried again, but I think that this attempt was even worse than my first somehow. I could not acheive the right silhouette that I wanted, even after trying the snap strap tool.

Ew what is this?

The result was a number of uneven ridges and a strange bulging effect.


I revisited the model in 3Ds max again and wondered if I could try using a high poly work flow for the handle of the sword and achieve better results. I created a cylinder again and bent it to shape, matching the base mesh I did earlier.


I then bevelled the subdivisions to create the appearance of bevelled leather handles.


I then used smoothing groups to soften it.


I am much happier with the effect of this rather than the Zbrush attempt as there is a lot more definition.


I then moved onto the shackle and the chains. I started by creating a cylinder, then deleting the caps and using the shell modifier to thicken it. I then adjusted the shape to make two interlocking parts and added a hinge on the back.


I used turbosmooth to neaten the shape.

I created a simple loop shape which would also be baked with the rest of the model.

Finally I created a bolt that goes through the objects and pins the shackle halves together, as I found in my references. 


I then started working on the chain links. I created a simple box shaped loop and subdivided it to create a high poly version that I could edit the shape well. 

I then trialed out the chain loops by duplicating one and placing it vertically to see the effect. I was happy with the outcome. I would only need one full loop to work with however in the final retop stage.


I used the same method to create the broken loop.


This is my prop making complete until the retopping stage. I am happy with these outcomes, although I will probably do a final tweak and review of the props later on in the process before I retop.


Captain Project Blog 5 - Sculpting more details

Work In Progress / 18 October 2020

Hello, welcome to the next phase of my character sculpt - detailing. Today I will be outlining the stages I took in fleshing out my captain character in Zbrush, starting with clothing folds. 


I began with the trousers, one of the biggest pieces of clothing on my model. I focused on areas where the folds would be most prominent, which was the knee area and around the ankles. I used a combination of free cloth brushes by Daniel Johnsson, and my own sculpting methods using primarily the dam standard brush with trim dynamic to flatten the edges.

Free brushes!

Dam standard and Trim Dynamic

I made sure to use reference of existing character models, mainly from Apex: Legends as reference for semi-stylised folds. 

I added in folds around the tension points of the body, particularly around the hips and back of the thighs where the fabric of the trousers was closer fitting.

I reduced the amount of symmetry so that the folds appeared more natural, especially around the crotch area.

Finally on the trousers I added an ironed crease along the front and back of the legs. I made sure that the crease was sharp so that it mimicked military uniform creases.


Next, I added in the basic folds of the shirt. Again I focused on areas of tension where the folds would be most prevalent first. This was around the rolled up sleeves and the shoulders. I made sure I used reference of shirts with rolled up sleeves to find the correct anatomy of the folds.

I then added in a seam line around the shoulder, and down the side of the shirt from the armpit area. I used the dam standard and pinch brush for this.


Next I made the rest of the shirt components visible, so that I could continue to construct folds based on the location of these subtools. I created creases which derived from the belt tension, and creases across the bust which would result from the use of buttons and would give the shirt more dimension. 

I then added creases to the back, where the lower back would dip in and create a looser area of fabric, and also to show the tension of fabric from the shoulders.

I revisited the trousers to add on details that I left out, such as the seams along the inside and outsides of the legs.


This is what the major folds look like so far! I'm very pleased with how they are turning out.


The next phase was to add in more minor details to the sculpt, such as the fabric down the middle of the shirt and the collar.  I made sure I used the buttons as reference for tension points, like with the main shirt, as well as the belt.

I then sculpted the decorative collar trim, which I dynameshed and used a combination of dam standard, clay buildup and trim tools on. I wasn't very happy with this though, as it looked too uneven and ugly. I felt that I could produce something of a greater quality. 


I decided to consult one of my tutors for advice on how I should tackle the collar. He suggested that I use more reference images of brocaded gold on epaulettes and military embellished collars to help me find the main shapes better.
 

I made another attempt at the collar. I shortened the length of the embellishment and tried to create individual roped brocade parts. I really didn't like this as It looked messy and worse than the first attempt.

Therefore I tried again, and this time I used closer fitting pieces of brocade, and refined this. I liked this a lot better. It looked much neater and sharper than the first two attempts.

I used inflate to widen the brocade pieces and dam standard around the edges to make them stand out.
I was much happier with this outcome.

I also added in belt holes using ZSub with the dam standard and inflate brushes. I used the original concept closely for reference of the locoation of the holes.

The next piece of clothing that I detailed was the single glove. I pulled up some reference of cavalry gloves so that I could understand how the seams looked and where they would be places, as well as the shape of the glove. I began this by adding a jutting seam along the perimeter of the glove. This would create a squared-off silhouette along the fingers which is typical of cavalry gloves.

  I then added in the smaller seam details, such as the thumb seam and the wrist seam, as well as the three embellishments along the back of the hand.


 Next I created some basic seams of the shoes, but I ended up somehow ruining the other shoe entirely. I think there was an issue with the symmetry. No matter, as this is something I can correct later on using the mirror tool, however, I wasn't fully satisfied with these seams as I felt that there should be a lot more to the shoe. A classmate told me about a tutorial that I could follow on making boots by Michael Pavlovich on Youtube, and so I decide that I would tackle this using the tutorial the next day.


I moved on to something else to give my brain a break from making clothes. Using the chain models I created in the last post, I imported them into Zbrush and duplicated the chain pieces alond on axis, until I had created two lengths of chain. I parted them from the line of the body, as I intend on rigging the chains separately.


  To attach them to the belt, I placed the rings on the two belt loops on the right hand side of the body, as shown in the concept.
 

This is how I duplicated the individual links, which I then grouped into folders and eventually merged.

Thank you for reading these stages of my project, I have a lot more coming soon.


Captain Project Blog 3 - Continuing the Blockout

Work In Progress / 10 October 2020

Welcome back to the next part of my project, I think that I am making good progress with this so far. This will be quite a long post as I will be writing about the remainder of the blockout for the character.

 I continued working on the clothing, creating a cavalry glove using reference from both the concept and real life cavalry gloves. The glove is only on one hand in the concept. I'm really liking the asymmetry in this project so far as I think it is a lot more visually interesting. I didn't want to make the glove too thick, but also not too delicate like a formal ladies glove.

I then created a skull cap for the hair. I created some basic ridges to mark the direction of the locs and to act as a base layer.
  

Using the picker tab and the curved tube brush, I changed the setting to continuous Z so that the lock would bind to the hair cap and be easier to style.


  To make the locs more visually interesting I looped some over eachother, which also helped me to fill in large gaps. I will refine the locs later on and add smaller ones for variety and to further flesh out the hair.

The hair in the concept sketch is asymmetrical, and whilst I don't have a back image of the character, I imagined two asymmetrical pony tails of locs.


  I was happy with the locs on the scalp, and they acted as a good guide for the locs coming out of the pony tails.


  I will need to greatly refine the base, especially around the edges of the hairline.


  Whilst the view from the top doesn't matter so much as she will be wearing a hat, I still wanted to make sure it looked good without it.

I crafted the ponytails using the same curved tube brush, but I turned off continuous in picker. This allowed me to freehand draw dangling locs rather than those binded to a surface.


  I really liked the silhouette from the front. I think that the position and different lengths of the locs make the character look a lot more interesting.

I crafted a blockout for the epaulettes on the shoulders of the jacket. I used the same techniques as with the rest of the shirt components.


  Here is the character blockout up to this point. I think that she is really coming together, and the next step from here was to craft a hat base.

I gathered more reference for a civil war Kepi hat, and decided to make it in 3Ds Max before importing it into zbrush for extra details. I started with the peak of the hat. 

I used the Open Subdiv and turbosmooth modifiers, separating faces into smoothing groups for an accurate shape.


I created the rest of the hat using a cylinder, deleting the bottom face and using the Shell modifier. I then used the open subdiv and turbosmooth modifers on this component for a softer shape, as well as soft selection to adust the vertices.


I then attached the objects together and exported the hat for Zbrush, where I would add the strap and the badge on the front.

I positioned the cap in a lopsided position to match the concept, and adjusted it to fit her head. I really liked how it came out. I used the extract tool to create a masked out hexagon and placed it into the correct position.

I also used the curve snap strap tool to create a simple thin strap around the base of the hat. I then adjusted any uneven areas using the move tool.


At this point, my life drawing tutor gave me some feedback on the proportions of the face. As I had suspected, the features were too close together and there was slight distortion of the face shape that was incorrect anatomically. I used a reference of Bangalore's face from Apex: Legends to help me adjust the anatomy and see what exactly I could do to stylise it well. I also worked with my tutor to fix the issues, starting with the eye distance. I parted the eyes a bit, and elongated the nose. I also fixed the height of the lips and the positon of the cheekbones. I also needed to fix the jawline height and the bridge of the nose, which was dipped into the face too much. Once I applied these fixes I was much happier with the appearance of the face!


Improved face!

Finally I added eyebrows to the face.


The next stage was blocking out the cape. To do this I used reference of hide capes, to get a rough edged asymmetrical appearance.


At first I found that I disliked overly jagged shape. I realised that once the tassles were on the cloak it would create a rough edge anyway, and so I softened out these edges instead.

I also maintained the off-centred appearance.

I returned to the belt, and added details like belt loops and a buckle. I used the curve snap strap tool for the belt loops.

My first attempt of the belt loop involved the snap strap tool, but I decided that it wasn't neat enough and I would achieve a much better hard-surface result in 3Ds Max.

Therefore, I created a basic shape and added open subdiv and turbosmooth modifiers, whilst also editing the smoothing groups to maintain the appearance of differently facing surfaces.

I also added the tab attached to the belt buckle.

This was brought into Zbrush then positioned into place, before I added the piece of leather on the other side of the buckle.


The last major component of the character blockout is the shoes. I separated the feet from the rest of the body and reduced the resolution. She would be wearing slightly heeled boots that I found in my research.


I then used the trim dynamic brush to create the flat and angular faces of the boot. 


  I applied a sole using the extract tool and reduced the res of this too to make it easier to work with.


I then created heels of the boot. They were then tidied up using the trim dynamic tool once again. I will use dynamesh on the heel and sole to combine the two and smooth them out, so that they match the style of the boot in the reference.

I am very pleased with the blockout so far. There is obviously still a lot more to refine, but I think I have my bearings on the project now. As a final quick addition at the end of the day I added the buttons. In the texturing process I will make an alpha stamp to create the embossed Union symbol on the buttons, rather than sculpt the symbol on the button here. I think that it will look a lot better.


Captain Project Blog 2 - Starting the Blockout

Work In Progress / 10 October 2020

I started the blockout by pulling up some 3D body scans as reference for proportion and shape, even though the proportions will be slightly stylised later on in the process. I began by using Zspheres to make a simple structure, then turned this component into an adaptive skin. From here, I reduced the resoloution to work solely on the simple forms of the body. 


This torso looks absolutely terrifying and not at all anatomically accurate, but at this stage I was filling out the skeletal structure as I went. I also used the book 'Anatomy for 3D Artists' by Legaspi to aid me on my blockout journey. I found that there were areas of the body that needed to be more curved, such as the upper back, and more raised, like the hips. I used the 3D scans from all angles as a guide.

Very basic feet to start with.


The next stage was to begin blocking out the clothes. I masked off an area, refined it, then used the extract tool to create a subtool for the shirt. I rediced the poly count to make it easier to work with at this stage, and maniuplated the surface to mimick a shirt shape. It is important to note how the fabric is not meant to be vacuum sealed around the chest, but rather it stretches across instead. I will place in creases further down the workflow.

I also modeled the face, using the concept closely for reference, as well as some similar faces I found online. I enjoyed this part of the process, although I will definitely go back and refine the shapes of the face and the proportions, as I do not think they are 100% correct, even for a semi-stylised character.  The features are too close together I think.

I also made some basic markers for where the crease above the belt would be, and I thickened the sleeves.

I then refined the collar shape and created the layer of fabric that covers the front of the jacket and the collar. I also pointed the bottom part of the fabric to match the shape seen in the concept. 

This is how the basic shirt blockout looks so far with the face. I think that I still need to edit the shape of the collar, perhaps by brining the front part down a bit and raising the back.

I upped the res and smoothed out the shape better.

At this point the collar was really annoying me so I went and edited it again. I brought the front down and raised the back, like I said I would, and was immediately pleased with these results. It also was more anatomically correct and it made way for the volume of the trapezius muscles that would rise up to meet the nape of the neck.

I worked on a simple belt also, working on getting an even shape before cinching it in.

I created the trousers using a similar method to the shirt, except I was not happy with the thickness of the legs with the trousers. Therefore I seperated the legs from the rest of the body, and grouped them with the trousers. From here I could edit the thickness of both the trousers and the legs underneath. I am aware that I probably won't need to keep the legs subtool once the trousers and feet are sculpted, however at this point I still want to use them as a guide.

I was much happier with the thickness of the legs after this step, as they matched the concept better. However, I will still edit the shape once I refine the trousers later on.

To create the hands, I used the IMM Bparts basic hand. Is this cheating? I don't think so, as I changed a huge amount about them, from the proportions, to the shape of each individual finger. I was thinking about efficiency and this was the most efficient thing to do, whilst at the same time ensuring that it was my work and it would be up to a good quality.

I used my style reference guide whilst working on the hands. I altered the position of the fingers, which would make the retop and rigging process easier.


I think I got a bit carried away here with details at this stage, as I ended up modelling in anatomical details that A) weren't neccessary at this point, and B) probably wouldn't match the style of my character. Reagrdless, this was good anatomical practise. Again I used the book 'Anatomy for 3D artists'.


For the first half of the blockout, I think that I have made good decisions, an I know what I need to work on in the refining stages to create a more convincing and well-made model.